Paisley potato printing

After Alice and I made our bird and leaf lino cuts for the William Morris Society earlier this year, I figured my next printing project would have to be even more elaborate and ambitious, because, well, I’m competitive with myself. But a crafty night in with my flatmate, a roll of brown paper, a potato, craft knife and some gouache paint has reminded me how satisfying the simpler projects can be.

paisleypaper01paisleypaper02
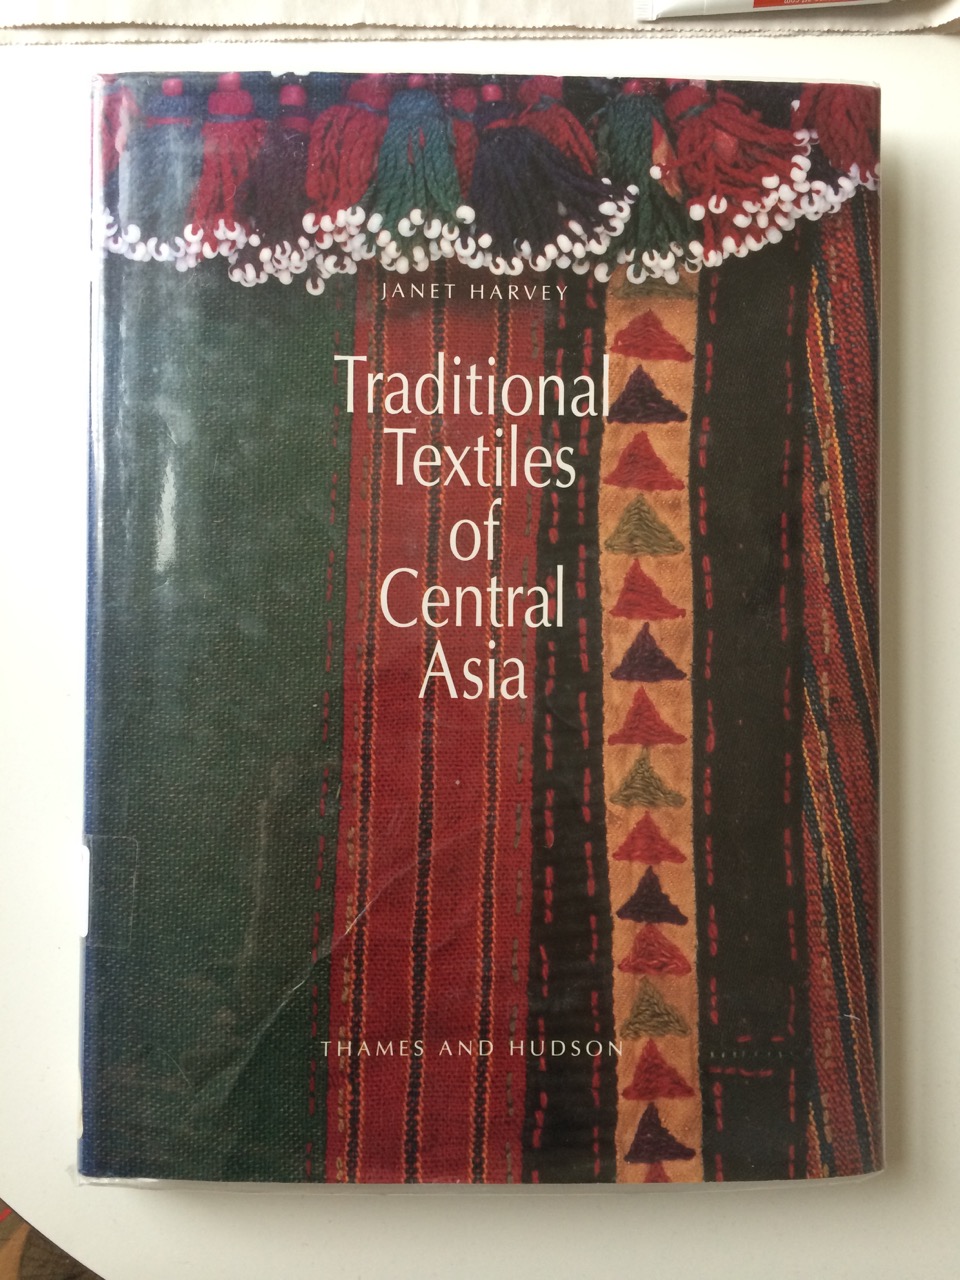
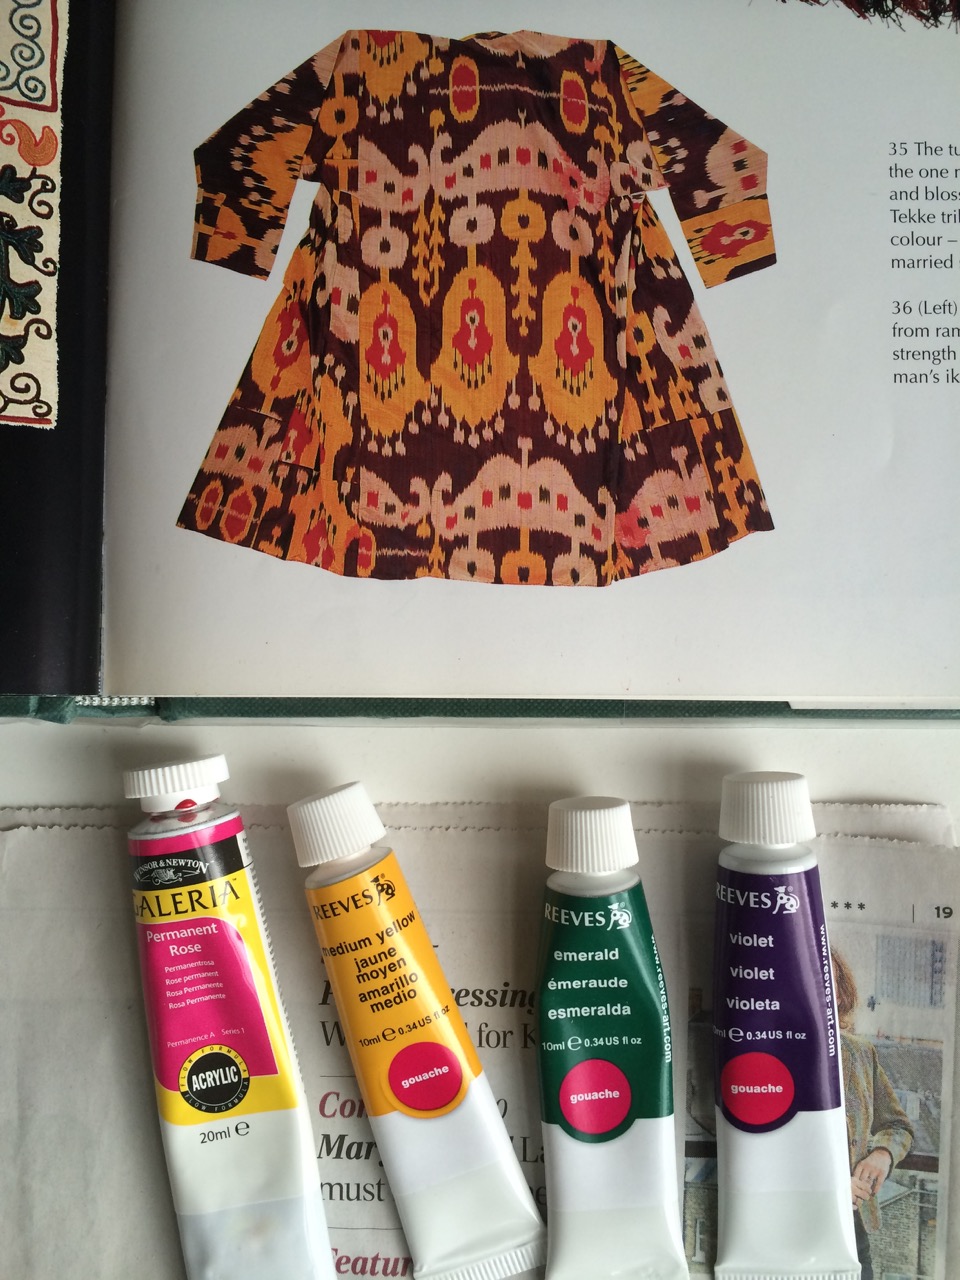
I cut out a very simple paisley design and printed the whole roll of paper with white footprints. I went to bed feeling just a little bit smudged. The next morning I added some colour, picking combinations from a very lovely library book on Central Asian Textiles (perhaps Indian or Scottish textiles would have been more appropriate, but this eye-popping blaze is just what I wanted and had to hand). paisleypaper03 paisleypaper04 paisleypaper05 paisleypaper06 paisleypaper07 paisleypaper08 paisleypaper10

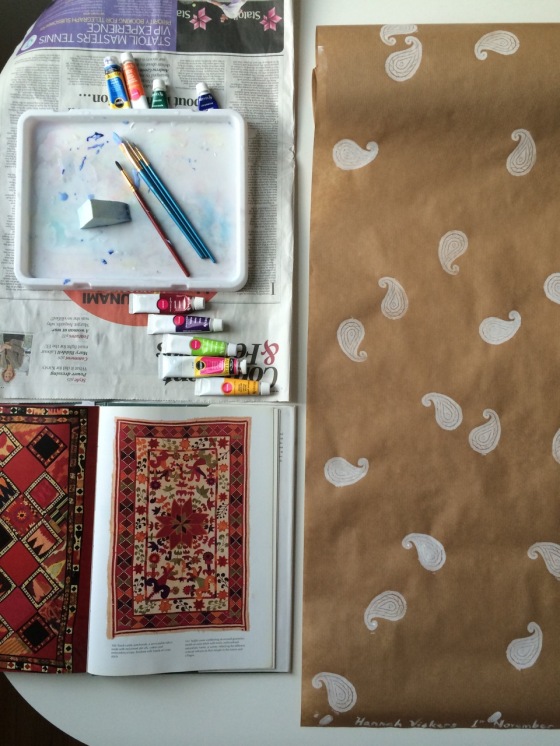
I was inspired to use a paisley design by what I’ve recently learnt about the history of the Scottish textile industry, and its surprising international connections. Paisley is a town in West Scotland which became so well known in the nineteenth century for its reproductions of imported Indian shawls that the motif (also known as boteh) became synonymous with the town.

At Glasgow University some interesting research is uncovering various aspects of the Scottish Textile Industry. Below are links to current research projects:

ReCREATE – a network of specialists and academics researching Scotland’s textile industry during the Industrial Revolution. Talks at an event of its forerunner ReINVENT are available to view here.

Glasgow Dyes Project – Julie Wertz’s PhD project to research and recreate the brilliant ‘turkey red’ dye used by Scottish dyers. She’s also written a post about her research here on the Centre for Textile Conservation and Technical Art History blog.

Darning Scotland’s Textile Heritage – the University of Glasgow archive’s project to enhance their collection of records relating to the Scottish textile industry.

Spend less, Mend more

One way to slow the pace of fast fashion is to mend more. Adding patches, mending zips, sewing buttons back on and stitching tears all prolong the life of an item of clothing, and stem the tide of buying more. It also takes little time, saves money and is much easier to do than you might think (but if you’d rather not do it yourself, it’s also easy to find tailors/ drycleaners who provide mending services).

In the process of packing my bags for Glasgow and preparing for the course, I’m making sure all my clothes are in good shape, and getting a bit of sewing practice in too.

pocket1

holey pocket: before

pocket

holey pocket: after

I learnt most of my mending tips and tricks from my granny’s little pink ‘Make Do and Mend’ pamphlet, which contains specific instructions on different types of fabric and wear, with very helpful illustrations. I’ll blog some more information and images when I’ve remembered which box it’s packed in.

In the meantime, here are a few half-decent instructions I found online.

How to sew on a button – Instructables

Fix a zip – Wikihow

How to patch a hole – Martha Stuart

Art lessons

kievjuly21As a (freelance) teacher of Art and English, I’m always trying to think up new projects and ideas for lessons. Most of the time I try to take the lessons outside to parks, museums and galleries, where we can draw from observation and learn about art first-hand.

We also have some favourite classroom-based games, including:

– “What Am I?” (names of animals are drawn on numerous pieces of paper, each person sticks one to their forehead and tries to discover which it is by asking Yes/No questions like “Do I have hooves?”)

– “Exquisite Corpse”, aka “New Species” (each person draws part of a figure, then folds over the paper and passes it to the next person to complete)

– the self-explanatory “Keep-the-pencil-on-the-paper” and “No looking” drawings

– “Describe the picture” (one person picks a picture from an art book and describes it for the other person to draw)

On one of the rare occasions we weren’t out and about on my last visit to Kyiv, I came up with this very simple mosaic-making project. Suitable for all ages (with varying degrees of assistance).

How to make a paper mosaic Continue reading

Embroidery practice

Earlier this year I attended a Jacobean crewelwork class at Hampton Court Palace – a Christmas present from my benevolent sister.

I’ve finally just got round to finishing off the piece, being in need of a) a kick up the backside and b) some serious needle practice for the textile conservation course starting in September. Conservation stitches are quite different to embroidery – the priorities being support and discretion – but I think any practice is useful.

The course was fantastic for learning a variety stitches in a short space of time, and from a professional embroideress. However, I was a bit disappointed we weren’t shown some original examples, and used cotton rather than the more traditional linen.

peacockThe piece includes the following stitches:

  • back stitch
  • satin
  • stem
  • split
  • french knots
  • chain
  • seeding
  • bullion
  • long and short
  • padded satin
  • fly
  • herringbone
  • closed herringbone
  • ermine
  • battlement couching

I added a stitched epitaph, inspired by the Victorian samplers that usually read something along the lines of this, for example: “Elizabeth Irwins work age 10 March 5 1848. All you my friends who now expect to see A piece of work performed by me cast but A smile on this my mean endeavour Ill strive to mend and be obedient ever”.

I make no such promises!

Bird printed tea towels

Our lino cuts at the William Morris Society came out so well I’ve been using them to print tea towels to sell in the gift shop.

teatowels06
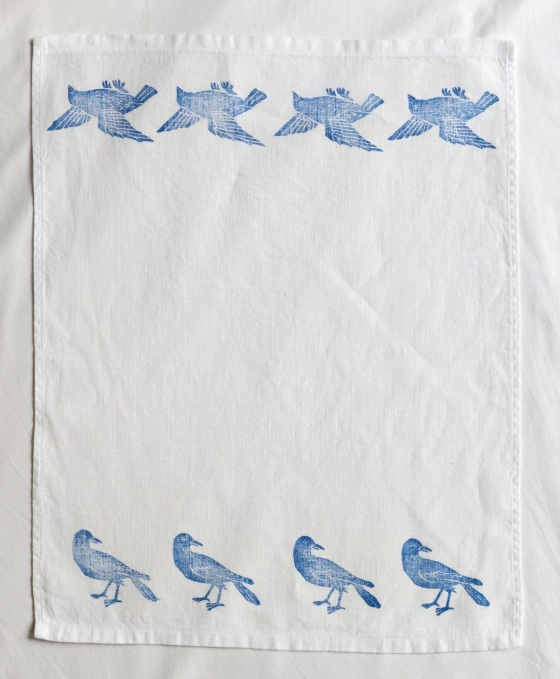
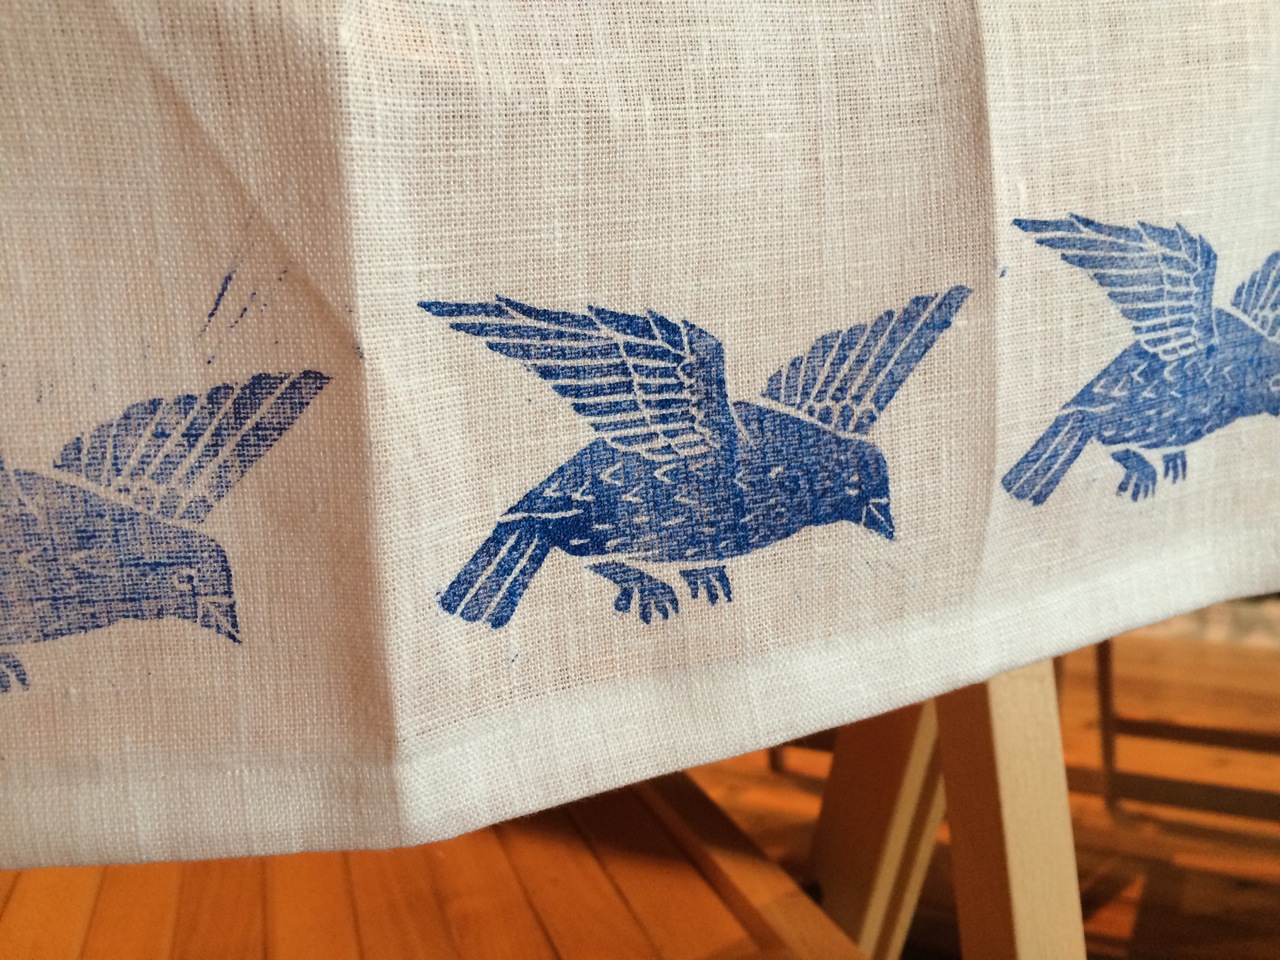
The fabric is medium-weight Belarusian linen, bought on one of my trips to Donetsk. I stitched the tea towels on my trusty 1956 Singer machine, printed, ironed, washed and ironed them again to make sure the colour stayed fast.    towel5towel1towel2towel4towel3Here are the first four so far, two of which sold on day one!  teatowels01teatowels03teatowels05 teatowels09teatowels08

More lino cuts at the William Morris Society

On Wednesday I got round to the exciting activity of testing out the lino cuts Alice and I made last week for the William Morris Society. I keenly/ naively decided to test them out on my nice Belarusian linen, with which I’ve been learning quite a few things about fabric printing lately, and the extra challenges it throws in.

IMG_1317

Ink

I used pots of Dylon fabric here, because I happened to have some different colours at home. Permaset printing ink gives a clearer, easier print, I think because the consistency is thicker, but since I only have black – not very common in Morris’s designs – I opted for the Dylon today.


Roller

It took me a long time to realise that a hard roller is the wrong tool for the job when it comes to printing on fabric. A foam roller is best  – art shops supply dinky versions of the DIY ones.


Technique

Put a blob of ink on a flat tray, then lightly spread it out using the roller, lifting the roller up a few times to make sure it has a layer of ink all over. Then, and this is crucial, roll it very lightly over the surface of the print, trying to cover the surface evenly and avoiding the background. If you press the roller into the print, as you would with a hard roller, then the ink will just get pushed into the lines and negative space of the design, accumulating and causing a ‘bleeding’ effect. And swearing. Press the lino quite hard onto the fabric for about 30 seconds or so.


Re cutting

As you can see from the test strip, a lot of ink was picked up by incidental cutting lines in the background. I really liked the ‘radiating’ effect this gave, but, for our purposes, they had to go. So, I used the initial test print as a guide to tidying up the lino cuts.

IMG_1318

Admittedly, Morris probably would have thought these initial attempts pretty shoddy – the prints are inconsistent and have a few background marks. But then, I quite like the telltale signs that tell you something’s handmade.

IMG_1320By the way, I’ve written this post from Kiev, where I’m on a three-day holiday before I’m off to Donetsk. Pictures to follow!

Herculaneum pillars

In an effort not to come across as bragging, I’ve failed to even mention an amazing family holiday in Naples last month. Better late than never.

It was wonderful to spend a week exploring a beautiful but gritty city (but not in the way London is, with more history and noise and round-the-clock street life), enjoying an espresso and fogliatella pastry for breakfast and pizza for lunch and dinner, and taking the train further out to the sites of Pompeii and Herculaneum. It was an odd sensation to wonder around the streets of these two frozen Roman cities, stepping from ancient cobble to ancient cobble, passing food stalls with their terracotta pots set into marble counters and occasionally wandering through a doorway into a villa or public baths. It felt like the locals had all just gone on holiday somewhere.

Here’s a picture of a courtyard in one of the grand villas of Herculaneum, the pillars of which struck me as good for a striped knitting pattern. I still find graph paper and felt pens the easiest and most satisfying way of designing patterns.pillar2

pillar3pillars


vesu
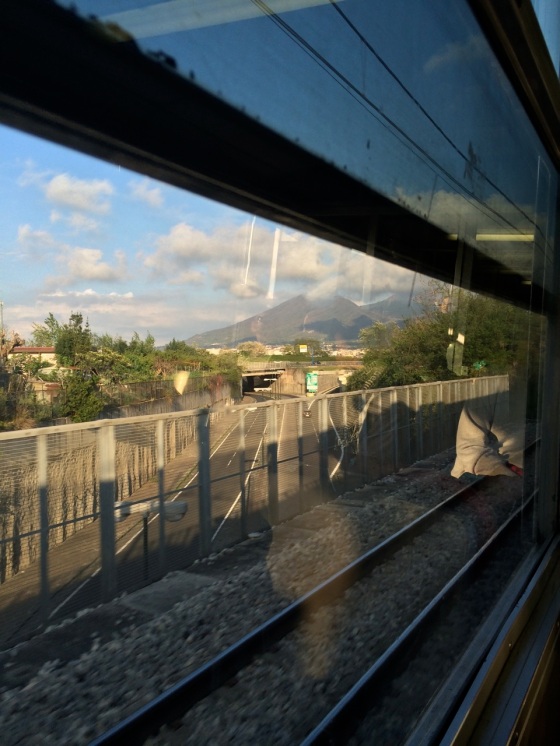
On the train back from Pompeii, Sayed and I listened to PJ Harvey’s ‘This is Love’ on headphones, restraining ourselves from leaping around the carriage and nearly imploding in the process as we passed Vesuvius, which I was convinced was about to erupt. If any song could make a volcano erupt, it would be this one.

Lino cuts at the William Morris Society

As you can probably tell, lino printing has become a bit of an obsession lately. I’ve been making lino cuts both at home and at the William Morris Society in Hammersmith with my friend Alice, assistant curator there.

We’re making linos based on motifs in Morris designs from the Society’s collection, to use in printing workshops for school groups. Our linos are mainly based on two of Morris’s lesser-known designs, Bird from 1878, and Grafton from 1883.

IMG_1115I had the privilege of taking a good look (and some bad photos) of the two original designs, both housed in the Society’s collection. Bird and Grafton were both made well into Morris’s career as a wallpaper and textile designer. You can see this in his precise and confident drawing of Bird, which contrasts with the rubbings out and alterations apparent in his first wallpaper design, Trellis, of 1864, for which he employed the help of his friend Philip Webb. Bird is a symmetrical design, so Morris only needed to colour in half of it, giving us an insight into his working process and drawing style.

Detail from original design drawing ‘Bird’ by William Morris

Detail from original design drawing ‘Bird’ by William Morris

Grafton is an unusual Morris design, being the only one resembling a stencil design. Most of Morris’ designs are much more complex, employing interwoven elements and many more colours. His most complex wallpaper and textile designs could need over twenty woodblocks (one for each colour) to print.

IMG_1088

IMG_1082 Detail from original design drawing ‘Grafton’ by William Morris

Perhaps I’ll try a more ambitious two-colour (not twenty-colour) design next, but for now, we’re quite happy with the results of our first… IMG_1117…and second lino cutting sessions. IMG_1269

morrisburnejones

Cartoon by Edward Burne-Jones, showing Morris carving a woodblock

Photos of Grafton and Bird by kind permission of the William Morris Society.


Lino printing adventures

Having bought some lovely white Belarusian linen in Ukraine, I’ve decided to try printing on it, this time using lino instead of potato. Here are my first, pleasing, if not entirely successful attempts. I’m using Dylon fabric paint and lino from an arts supply shop, but have a feeling one or both of them is causing the prints to come out too weak. The lino seems a little bit hard and brittle, and the paint doesn’t seem as sticky as it should be for printing.

In a recent post, I started to put my thoughts about the garment industry and its problems into words. It’s made me want to look more closely at clothing and fabric, so my first lino cut was inspired by this – literally looking closely at, or ‘zooming in’ on the fabric on which it’s printed.

My second print was borrowed from a blackwork embroidery design in Rosemary Drysdale’s The Art of Blackwork Embroidery. Blackwork is a type of embroidery used in England from the time of Henry VIII, often seen poking from collars and cuffs in Tudor portraits, as in this painting by Holbein, and sometimes for more largescale decoration, such as in this portrait of Elizabeth I. After I made the prints I came across other blackwork embroidery designs resembling fabric weave, so I’ll take the happy coincidence of the two designs being related as an encouraging sign!

20140501-121722.jpgprint20140501-121703.jpg

The cost of clothing

Tomorrow, it will be exactly a year since the Rana Plaza clothing factory in Bangladesh collapsed, killing 1129 of the workers inside and leaving many more injured.

Groups around the world will be gathering to remember those who died and to protest against a global fashion industry that continues to trivialize and endanger the lives of factory workers.

Some clothing companies have signed an Accord on Factory and Building Safety in Bangladesh, but others have refused, citing liability concerns and instead agreeing to improve conditions but on less stringent terms. And, according to the Clean Clothes Campaign, only a third of the money needed by survivors and victims’ families has been paid, with many companies yet to pay any compensation at all.

It seems clear to me that the only way to prevent more accidents of the same nature, we, as consumers, must take a stand. Ultimately, if we don’t buy from companies whose practices fall short of our ethical demands, then they can’t continue to profit from those practices.

By changing the way we buy and treat our clothes, we can change the system for the better. Here are a few things we can do:

Choose carefully. Buy good quality, ethically-sourced clothes. Although the immediate price is higher, buying clothes with better quality seams and fabric will mean you buy fewer items of clothing and save money in the long run. Also, buying something you really really like means you’re more likely to look after it properly and make it last longer.

Don’t worry about ‘trends‘. The fashion industry coaxes more sales out of a saturated market by telling us we must keep up with the latest, constantly changing trends. In reality, finding clothes that fit and suit you is the easiest way to that rather furtive notion known as  ‘style’.

Buy secondhand. So much cheap, good quality and perfectly wearable clothing can easily be found on the secondhand market, from charity shops to upmarket vintage stores.

Take care of clothes. Properly cleaning, storing and mending clothes can hugely prolong their lives. Darning is really easy and, as Tom of Holland points out with his Visible Mending Programme, a mended patch can be worn as a badge of honour.

Buy handmade. Alongside the global fashion industry, there’s a growing global handmade market. Websites like Etsy make it easy to buy handmade clothing direct from the maker, and this means you can often request a particular size, colour or design. You can also find designer makers closer to home at local craft fairs and markets.

Make it yourself. Making your own clothing does require some time and equipment, but is pretty addictive once you get started. You can make clothes exactly how you want them to be, they’ll be completely unique, and it feels wonderful to wear something you’ve made yourself. It’s also really easy to get started – there are lots of excellent online tutorials and books for beginners, and many groups like our collective Craft Guerrilla who host workshops and craft nights.


If you’re in London tomorrow, join us on Oxford Street to mark the anniversary of the Rana Plaza tragedy. You can find more information on the event’s facebook page.

This interactive documentary by the Guardian newspaper tells the story of the Rana Plaza factory disaster and what has happened since. The Shirt on Your Back